Secure connections (SSH, SSL, PuTTY)
Encrypted database connections from DBConvert - built-in SSH and SSL, plus PuTTY tunneling.
Last updated September 12, 2026
SSH
Secure Shell (SSH) transfers data between machines over an encrypted channel. Use it when the database server is on a private network reachable only via a jump host.
In DBConvert, tick Use SSH on the connection step. Fill in:
- Host and Port - the SSH jump host (typically port 22).
- SSH version - leave this on SSH2. Protocol 1 has been cryptographically broken since 1998 and OpenSSH dropped it years ago; the option exists only for equipment too old to speak anything else, and a tunnel built on it is not protecting you.
- Initial method -
password,public key, orboth. - Login, password, private key, and key password as required by the chosen method.
- Local port for the forwarded tunnel.
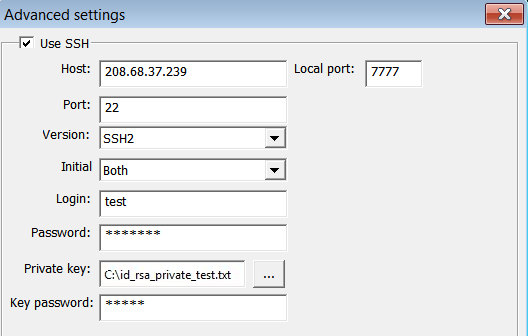
In DBConvert Studio
Same settings live on the SSH tab of the connection dialog.
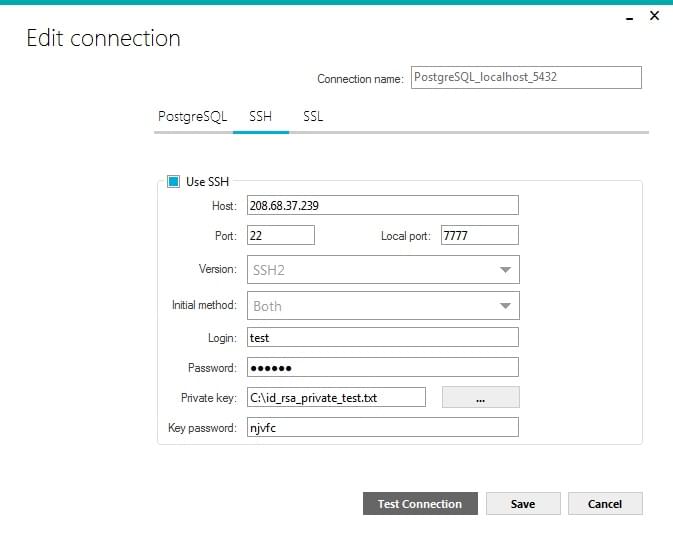
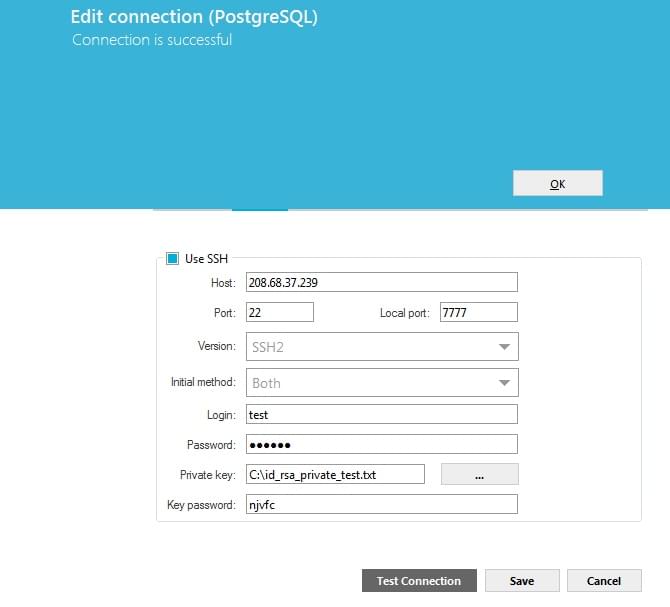
Click Test connection - a confirmation message appears on success.
SSL
SSL encrypts the database connection itself, without a separate tunneling layer. Use it when the database server exposes an SSL endpoint (Azure SQL, Cloud SQL, RDS with forced SSL).
Tick Use SSL and provide:
- CA certificate - the certificate authority bundle.
- Cipher - cipher suite to use.
- For mutual TLS, also tick the authentication checkbox and provide the Client certificate and Client key.
PuTTY tunnel before connecting
If your environment relies on PuTTY for SSH tunneling, set up the tunnel first, then point DBConvert at localhost + the forwarded local port. This works regardless of which database engine you connect to.
1. PuTTY session
In PuTTY Configuration → Session:
- Host name - outer server domain or IP (example:
192.168.0.11). - Connection type - SSH.
- Port - 22 (default).
- Saved session name - any name, e.g.
Connect_SSH.
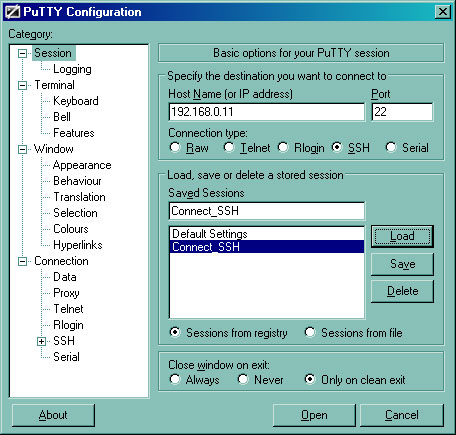
2. PuTTY tunnel
In Connection → SSH → Tunnels:
- Source port - any local port above 1024 (example:
2000). - Destination - database server address and port (example:
192.168.0.11:3306for MySQL). - Type: Local. Click Add.
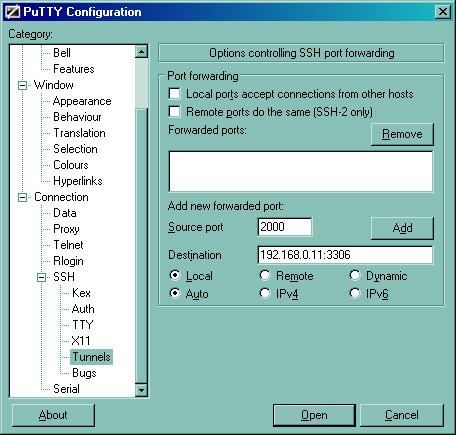
3. Open the tunnel
Open the saved session. PuTTY asks for the SSH user's login and password on the jump server - this is not the database user.
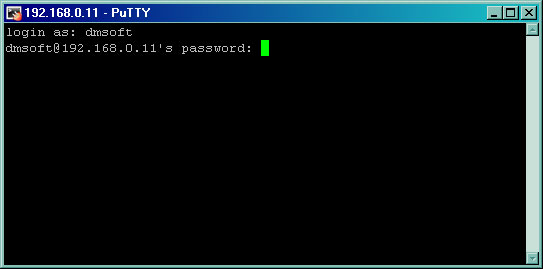
4. Connect from DBConvert
In DBConvert's connection dialog:
- Hostname -
localhostor127.0.0.1. - Port - the local port from step 2 (
2000in the example). - Username / Password - the database user. This is independent of the SSH user.
The port is the part people get wrong: it has to be the local port you forwarded, not the database's own 3306 or 5432. Pointing at the database port sends the connection straight past the tunnel.
Do the same on the destination step if the other database is also behind the tunnel.
PuTTY-style options inside DBConvert
If you already know your SSH parameters, you can skip launching PuTTY separately and use DBConvert's built-in SSH forwarding instead. Click Advanced on the connection dialog and tick Use SSH.
The same separation between SSH user and database user applies - one set of credentials for the SSH tunnel, another for the database itself. DBConvert opens the tunnel for the duration of the job, so nothing has to be running beside it.