Connect MySQL / MariaDB
Connection setup for MySQL and MariaDB as a source or target: local server, Amazon Aurora MySQL, and Google Cloud SQL for MySQL.
Last updated September 12, 2026
For the generic source-and-destination workflow, see Source and destination connections. This page covers the MySQL-specific setup steps.
Local MySQL server
DBConvert connects as a regular MySQL user, so the setup is a CREATE USER and a GRANT. Run them as an account that already has CREATE USER and GRANT - your administrative user - in whatever SQL prompt you have: the mysql client, MySQL Workbench, or the SQL console in DBConvert Streams.
Replace the host part with the IP of the machine where DBConvert runs. % allows any address and is worth avoiding on a server that is reachable from outside.
CREATE USER 'dbconvert'@'203.0.113.10' IDENTIFIED BY 'a-strong-password';

-- On the source server: reading a database takes SELECT and nothing more.
GRANT SELECT ON source_db.* TO 'dbconvert'@'203.0.113.10';

-- On the target server: these are what build the schema and fill it.
GRANT SELECT, INSERT, UPDATE, DELETE, CREATE, ALTER, INDEX, DROP, CREATE VIEW
  ON target_db.* TO 'dbconvert'@'203.0.113.10';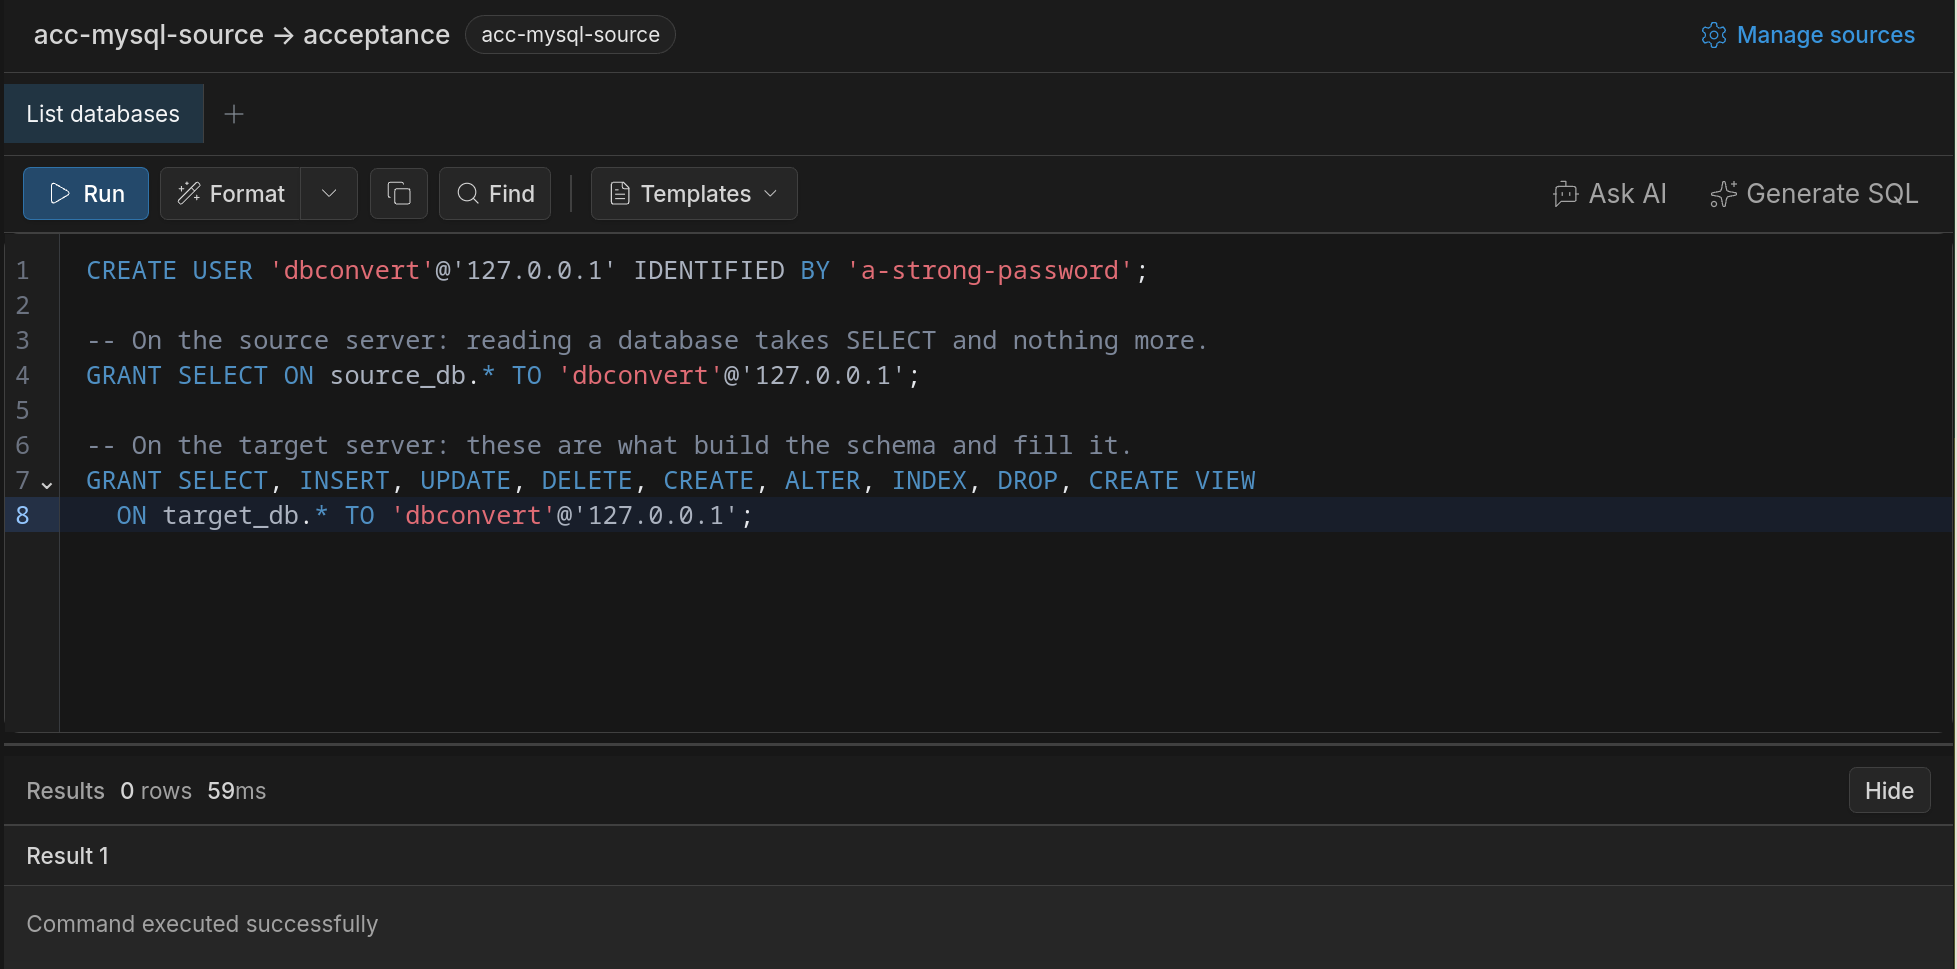
127.0.0.1 here because the server is on the same machine - use the address of the machine running DBConvert when it is not.Source and target are usually two different servers, so run CREATE USER plus the matching GRANT on each one. When both databases live on the same server, the whole script runs as it stands.
There is no FLUSH PRIVILEGES to run afterwards - GRANT takes effect immediately.
If the same user is for synchronization rather than one-shot conversion, add TRIGGER as well: trigger-based sync installs triggers on the tables it watches.
Network and host access
The grant above controls which host the account may connect from. Two things outside MySQL still have to let the packets through.
The server must listen on a reachable address. Many distributions ship bind-address = 127.0.0.1, which refuses every connection from another machine before authentication is attempted. In my.cnf:
[mysqld]
bind-address = 0.0.0.0
port = 3306
The firewall must pass port 3306 from the machine running DBConvert:
sudo ufw allow from 203.0.113.10 to any port 3306Restart MySQL after changing bind-address. If the address in the GRANT and the address the firewall allows are not the same machine, the connection fails at whichever of the two is checked first - so keep them in step.
Amazon Aurora MySQL
Aurora MySQL connects exactly like a regular MySQL endpoint. The only specific step is getting the endpoint and port from the AWS console.
- Log in to the AWS console and open RDS → Databases.
- Select your Aurora MySQL cluster.
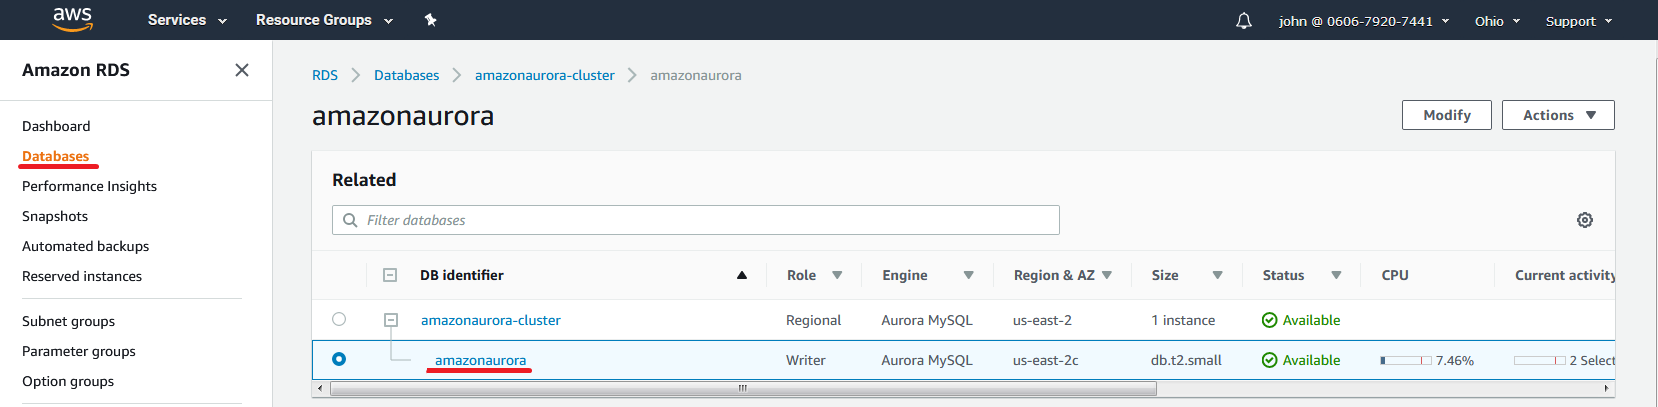
- Copy the Endpoint and Port from the connection details.
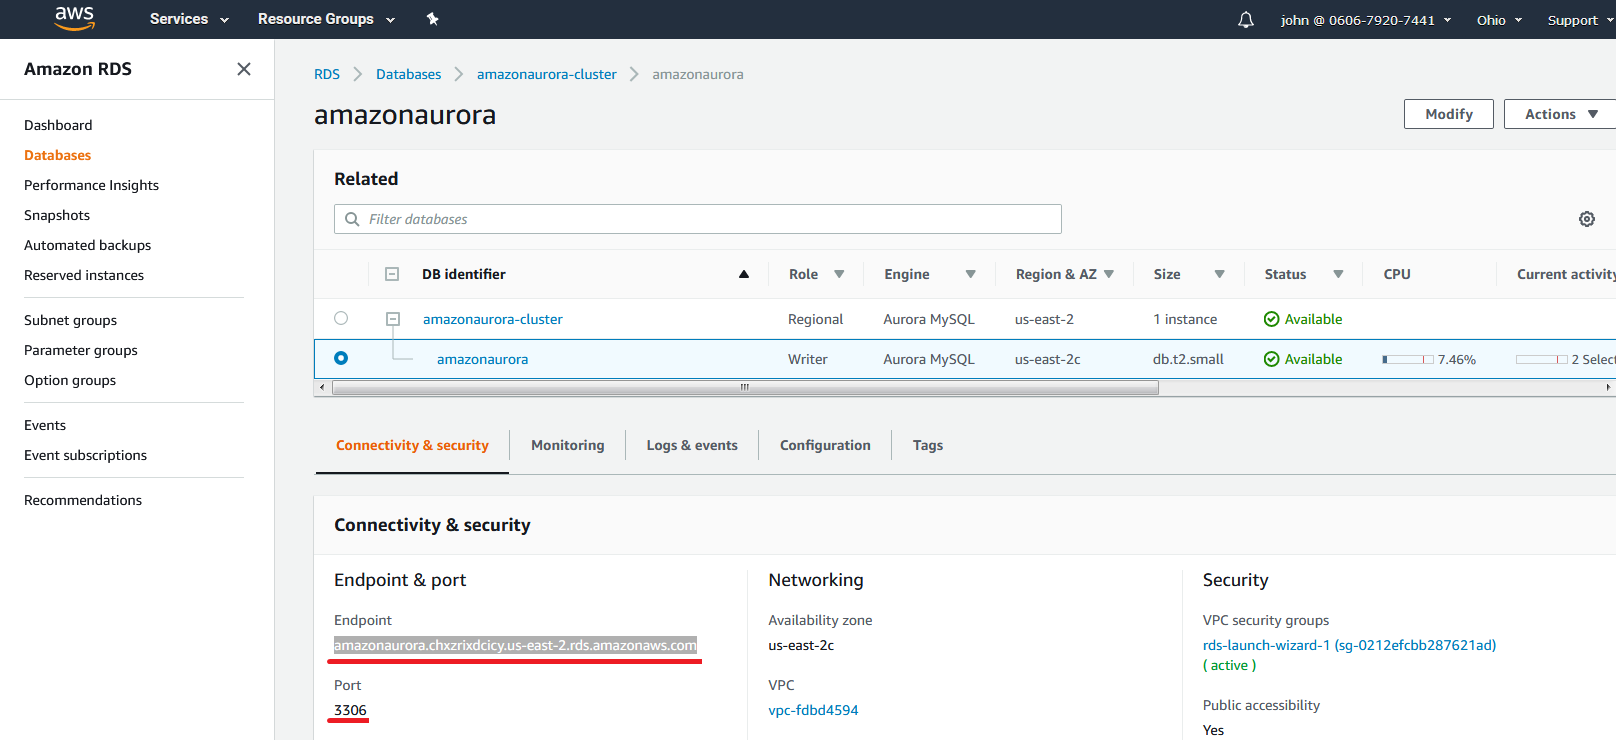
- In DBConvert, paste the endpoint into Host, port into Port, then enter the DB user and password. Click Connect.
- Click Refresh next to Database to list databases on the cluster, pick one, and continue.
For RDS endpoints that are not Aurora-specific, see Amazon RDS configuration.
Google Cloud SQL for MySQL
Cloud SQL exposes a MySQL endpoint behind an authorized-network rule.
- In the Cloud SQL console, open the instance and copy its IPv4 address.
- Under Connections → Authorized networks, add the IP of the machine where DBConvert runs.
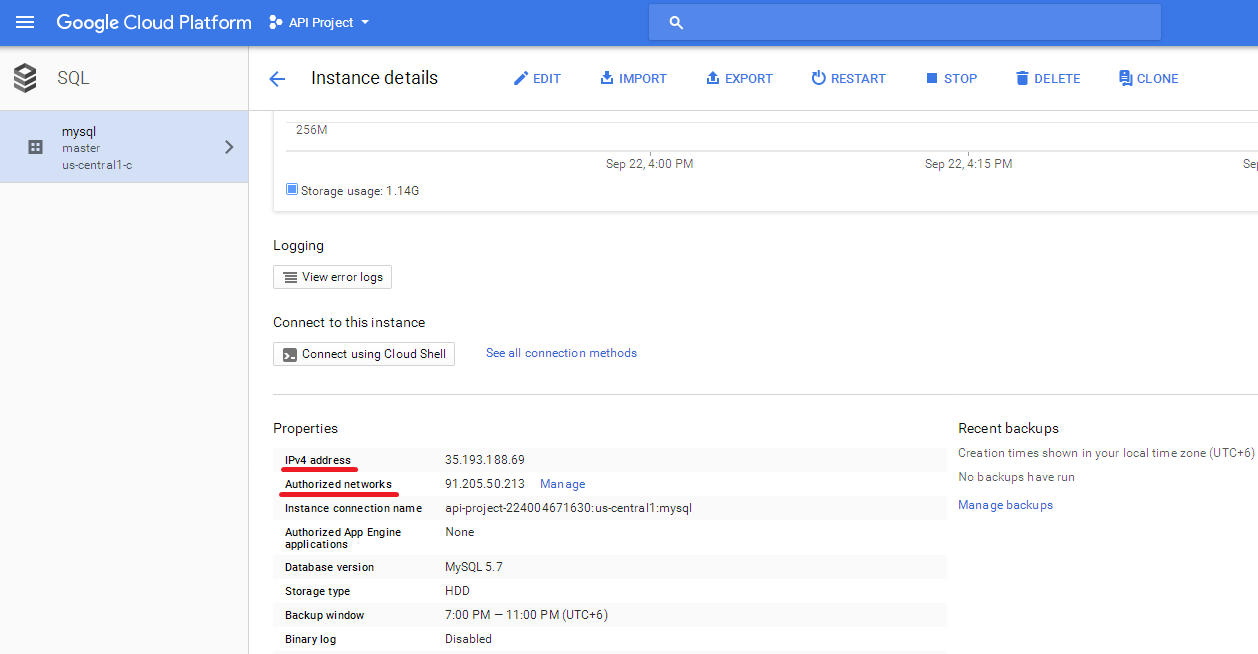
- In DBConvert, enter the IPv4 address as Host, the standard MySQL port, and the DB user.
- Click Connect.